This primer shows you how to develop an iOS app that uses the Bluetooth Low Energy standard to communicate with a BLE device.
Introduction
This is the second of a three-part series on the topic of app development using Bluetooth Low Energy (BLE) on iOS with the Core Bluetooth Framework, updated for Swift. If you are looking for the Objective-C version of this article, you can find it here. Also, if you haven't read it yet, you'll probably want to start with Zero to BLE on iOS Part One before continuing with this part of the series.
While specifically targeted at iOS developers with some knowledge of Objective-C or Swift and the iOS SDK and its basic concepts and patterns such as delegates, this series is intended as an introduction to help you get a look at what it takes to construct an app that can communicate with an off-the-shelf Bluetooth Low Energy device or interact with BLE components of your own design, whether you are a developer, designer, maker, or entrepreneur.
No previous experience with BLE is required, and all examples apply to both iPhone and iPad running iOS 9. After this series is over, you should have enough knowledge to begin developing your own BLE solutions for iOS, and where to find more information if you would like to do more digging on the subject.
Gearing Up for Part Two
Previously, we gave a general outline for the workflow surrounding finding and connecting to a BLE device. Now we'll present some concrete examples that show how to discover the device, connect to it, and read and write to the device’s Characteristics.
As was also mentioned in the first article, almost all interactions in Core Bluetooth involve using delegates, so you should already have some familiarity with delegates and how they work in the context of iOS and Swift. As was already mentioned, all the examples and the demo code itself have been updated with Swift 2.
Before we dive into the deep end and start developing an app that uses BLE, there are a few topics that we didn't touch on in the first part of the series that need addressing now.
What’s this Bluetooth ‘Smart’ I keep hearing about?
When you start looking for devices to develop with and explore, you may come across descriptions of devices that indicate that they are Bluetooth “Smart” devices, as well as references to devices that are Bluetooth “Smart Ready.”
In a nutshell, “Bluetooth Smart” is just a marketing label for Bluetooth LE. On October 24, 2011, the Bluetooth Special Interest Group (Bluetooth SIG), the organization that governs such matters sent out a press release announcing that Bluetooth Low Energy devices would thereafter be known as “Bluetooth Smart” devices.
Here's what you need to know about Bluetooth Smart:
- Bluetooth Smart Ready refers to devices like your iPhone. It contains two radios, one for standard Bluetooth and one for Bluetooth Low Energy (LE).
- Bluetooth Smart devices are the battery-operated low energy devices we connect to, like heart-rate monitors, thermostats, etc.
On the iOS side, we typically don’t refer to it as “Bluetooth Smart,” but rather “Bluetooth Low Energy” or just the shorter version, “BLE.” Even Apple, in their WWDC developer videos, refers to the technology as “Bluetooth Low Energy” rather than “Bluetooth Smart.”
I’ve noticed that on the hardware side of things it appears to be a bit of a mixed bag. Some hardware and chip vendor websites use “Bluetooth Smart,” while others use “Bluetooth Low Energy” or “BLE” with a parenthetical reference to “Bluetooth Smart.”
Which devices are Bluetooth Smart Ready?
As of this writing, the Apple mobile devices that are Bluetooth “Smart Ready” are any iOS device with hardware support for Bluetooth 4.0 or higher. Here is a comprehensive list on Wikipedia of iOS devices and their capabilities. Look for anything over Bluetooth 4.0. In a nutshell, for iPhone, it's anything higher than the iPhone 4s. In the iPad line, it includes the 3rd-generation iPad and subsequent models, including iPad Mini, iPad Air, and iPad Pro.
Conclusions about Bluetooth Smart
You'll definitely see the Bluetooth Smart label when you browse around Amazon or other shopping sites looking for BLE devices to play with. Additionally, device vendors use the Bluetooth Smart label when describing their devices on their websites. For this article, we will simply refer to this technology as Bluetooth LE or just BLE from here on out.
Caveats and Requirements when Developing for Bluetooth LE
There are some limitations and requirements to be aware of when doing BLE development for iOS.
The first involves the iOS Simulator. Interestingly, at one time, the iOS Simulator did support Bluetooth development (the WWDC 2012 Bluetooth 101 video makes a reference to this functionality), but at WWDC 2013, Apple announced that Bluetooth support would no longer be in the Simulator.
On the surface this appears unfortunate. However, developing on a device is a better and more accurate experience with BLE. Additionally, since all iPhones made after the iPhone 4s (2011) have Bluetooth 4.0 — and by extension, BLE — most iOS developers already have devices that support it. We almost don't even need to ask the question anymore, but it's good to know who can use it in case you do have a constrained set of device types for which you're developing apps or BLE devices.
Another important requirement to remember when doing Core Bluetooth development is that Apple places the majority of the responsibility of the interactions with BLE devices on the app developer. Very little is managed and maintained by iOS itself with respect to managing Bluetooth. One thing that's managed in the OS is the connection that appears in the Settings > Bluetooth app.
The rest is pretty much all the app’s responsibility:
- discovery
- connection management
- data exchange
- device management
- persisting the device
SensorTag Overview
An excellent device to experiment with BLE interactions – and the device we'll use here – is the Texas Instruments SensorTag. As of the writing of this blog post, the SensorTag costs just under thirty dollars and has quite a few interesting sensors built into it. Specifically, according to the documentation, the SensorTag contains “10 sensors including support for light, digital microphone, magnetic sensor, humidity, pressure, accelerometer, gyroscope, magnetometer, object temperature, and ambient temperature.”
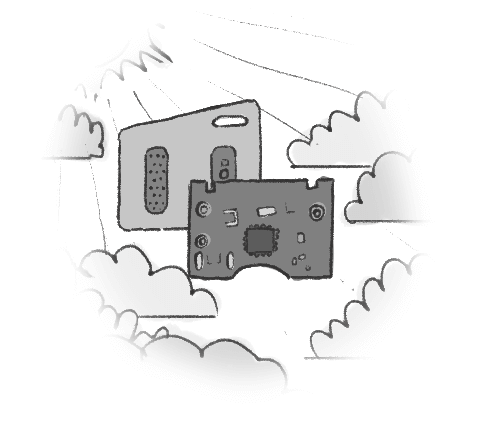
If you can get your hands on one, I highly recommend it. I think mine arrived in just a couple of business days, and it’s worth the short wait for delivery. The device is really meant as a prototyping tool for hardware developers, but for our purposes we’re going to imagine that the Sensor Tag is a thermostat from which we want to read the temperature and humidity.
Building an App
To best illustrate how the process works, let’s build an app! If you would like to follow along in the completed app project, you can find it at the accompanying Github repository for this blog post.
Launch Xcode. At the time of this update, I'm using Xcode version 7.3.1, Swift 2.2, and targeting iOS 9.3. Create a Single-View Application Project, and name it “TemperatureReader”, and save the project to a convenient location.
The project will have a ViewController already in the Main storyboard, so add a UILabel on the design surface of the view controller. Then, connect the label to an IBOutlet property in the View Controller’s code (I like to drag and drop into the code window and let Xcode create the reference and wire it up for me). Name it something catchy like “temperatureLabel.” Add another label and call it “humidityLabel.”
Creating the CBCentralManager
As outlined in our first article, the first thing we need to is create our CBCentralManager. If you recall, the CBCentralManager is responsible for scanning for, discovering, and connecting to peripherals.
We also know that we'll use one CBPeripheral for this project (though you could use more peripherals if you wanted to). Let’s create those properties now in our view controller.
var centralManager:CBCentralManager!
var sensorTag:CBPeripheral?
I like to think that the functionality of the CBCentralManager is kind of like a cascading waterfall, in which one process leads to the next...

After declaring those properties, the next thing we have to do is actually create the CBCentralManager. We’ll do this in our ViewDidLoad method of our view controller.
centralManager = CBCentralManager(delegate: self,
                                     queue: nil)
This creates a CBCentralManager object, assigns the view controller as its delegate, tells it to dispatch central role events using the main queue (you can use a different queue if you choose to do so), and does not pass any initialization options.
Scanning for Peripherals
Once the initialization occurs, the CBCentralManager calls the centralManagerDidUpdateState method. I have greatly pared it down for this section of the article, but the sample project has a more complete set of handling options:
func centralManagerDidUpdateState(central: CBCentralManager) {
    switch central.state {
    case .PoweredOn:
        // 1
        keepScanning = true
        // 2
        _ = NSTimer(timeInterval: timerScanInterval, target: self, selector: #selector(pauseScan), userInfo: nil, repeats: false)
        // 3
        centralManager.scanForPeripheralsWithServices(nil, options: nil)
    case .PoweredOff:
        state = "Bluetooth on this device is currently powered off."
    case .Unsupported:
        state = "This device does not support Bluetooth Low Energy."
    case .Unauthorized:
        state = "This app is not authorized to use Bluetooth Low Energy."
    case .Resetting:
        state = "The BLE Manager is resetting; a state update is pending."
    case .Unknown:
        state = "The state of the BLE Manager is unknown."
    }
}
The key part of this code snippet is the call to the CBCentralManager’s scanForPeripheralsWithServices(_:, options:) method (3). The way that we call it in this example by passing nil as the method’s first parameter indicates that we are looking for any peripheral with any Service. Generally speaking, this not a best practice, because scanning is a process that eats up battery life (more on that in a moment), and it is preferred to narrow down the number of candidates for discovery.
Typically, you will be developing an app for a device for which you know exactly what Service you’re looking for (for example, a heart-rate monitor Service, or the next cool wearable that your teammate on the hardware side is developing). Therefore, you will pass an array of CBServices in the first parameter to scan for only those peripherals that support those Services with which you wish to interact.
The boolean property keepScanning (1) has nothing directly to do with Core Bluetooth. We declare it and set to true and then we create an NSTimer (2) as a one-shot timer to manage the scanning in short, discrete bursts. We don’t want the app to keep scanning forever, because it is a pretty expensive process on the iPhone’s battery.
NOTE: The numbers in parentheses refer to the numbers in the code snippets, so you can refer exactly to the line that I’m referring to in the code when reading the commentary.
It is a better practice to let it scan for a few seconds (in our case we define the constant timerScanInterval as 2 seconds). The pauseScan method then creates another timer that waits 10 seconds and then kicks off another two-second round of scanning, so the process looks a bit like the following:

NOTE: If you prefer to use another mechanism other than an NSTimer to manage the scanning process timing, you may do so. This is merely for demonstration purposes and the bigger-picture issue is to be aware of the fact that managing the scanning is important to battery life.
Peripheral Discovery
Once we’ve kicked off the scanning with scanForPeripheralsWithServices(_:, options:), if your SensorTag is on, then the CBCentralManager will discover it and call the centralManager(_:didDiscoverPeripheral:advertisementData:rssi:) delegate method. This method is basically where the central manager tells us, “OK... I found a peripheral. Here it is. Check it out.”, and it’s up to the developer to inspect the advertisement data to see if we found what we were looking for.
In this case, we’ll inspect the name of the device. The SensorTag sends that in the advertisement data, which ends up as an NSDictionary by the time we get it in didDiscoverPeripheral. TI recommends that you just search for “SensorTag” (because they have made more than one type of SensorTag), but I’m using the more specific “CC2650 SensorTag” as the name I’m looking for since I only have one device, and I know ahead of time that the CC2650 is the one I want to detect. Therefore, if you have an older version of the SensorTag (which will work for this demo), it’s probably a good idea to use the shortened version recommended by TI.
if let peripheralName = advertisementData[CBAdvertisementDataLocalNameKey] as? String {
    if peripheralName == sensorTagName {
        // 1 - we can stop scanning now.
        keepScanning = false

        // 2 - save a reference to the sensor tag
        sensorTag = peripheral

        // 3 - set the delegate property to point to the view controller
        sensorTag!.delegate = self

        // 4 - Request a connection to the peripheral
        centralManager.connectPeripheral(sensorTag!, options: nil)
    }
}
Once we find it we can stop scanning (1), save a reference to the device (2), and set the view controller as the delegate for the peripheral (3). This will be important for receiving notifications later. The last thing we do in didDiscoverPeripheral is request a connection to the peripheral (4), which will enable us to discover the Services available on the device.
Connecting to the Peripheral
After requesting to connect to the peripheral, the centralManager(_:, didConnectPeripheral:) delegate method will be called.
Or at least you hope it will.
If a problem occurred during the connection, then the centralManager(_:, didFailToConnectPeripheral:, error:) delegate method will be called and you can inspect the NSError object to see what went wrong.
But assuming everything went well, centralManager(_:, didConnectPeripheral:) will be called and then we can discover the Services that the CBPeripheral object supports:
func centralManager(central: CBCentralManager, didConnectPeripheral peripheral: CBPeripheral) {
    peripheral.discoverServices(nil)
}
In the demo app that accompanies this article, I also update a label that indicates that we’ve connected but it’s not a requirement. The main thing we accomplish here is calling the discoverServices(_:) method on the connected CBPeripheral, which discovers the Services supported by the device. Passing nil to the discoverServices method to discover all of the Services that the device supports, though you can supply an array of Service UUIDs that the device exposes (more on UUIDs in the next section).
Return of the UUID
As predicted in the first article, we'll use UUIDs to identify the Services and Characteristics of the peripheral with which we communicate.
Your device vendor will usually define the UUIDs, unless you are using standard 16-bit ones from the Bluetooth GATT Services Specification. However, if you are the device developer, then you will be the one who decides what the UUID values will be for the Services and Characteristics that you'll support on your device.
Texas Instruments defines and documents the UUIDs for the SensorTag in their user guide for the device, and because we’re interested in temperature and humidity we’ll use the following ones:
struct Device {
    //...

    // Temperature UUIDs
    static let TemperatureServiceUUID = "F000AA00-0451-4000-B000-000000000000"
    static let TemperatureDataUUID = "F000AA01-0451-4000-B000-000000000000"
    static let TemperatureConfig = "F000AA02-0451-4000-B000-000000000000"

    // Humidity UUIDs
    static let HumidityServiceUUID = "F000AA20-0451-4000-B000-000000000000"
    static let HumitidyDataUUID = "F000AA21-0451-4000-B000-000000000000"
    static let HumidityConfig = "F000AA22-0451-4000-B000-000000000000"

    //...
}
NOTE: Please refer to the SensorTag user guide for the UUID format, the list of the available sensors, and their associated UUID numbers.
Peripheral Services
In our last step we called the discoverServices method of the CBPeripheral, and as you may recall back in the peripheral discovery phase, when we found the peripheral we wanted, we set its delegate to be the view controller. Now we’ll see why that step was important.
When we call discoverServices, the peripheral then fires the CBPeripheralDelegate’s peripheral(_:, didDiscoverServices:) delegate method and it passes an array of all the Services it discovered.
func peripheral(peripheral: CBPeripheral, didDiscoverServices error: NSError?) {
    // Core Bluetooth creates an array of CBService objects —-
    // one for each Service that is discovered on the peripheral.
    if let services = peripheral.services {
        for service in services {
            // 1
            if (service.UUID == CBUUID(string: Device.TemperatureServiceUUID)) ||
                (service.UUID == CBUUID(string: Device.HumidityServiceUUID)) {
                // 2
                peripheral.discoverCharacteristics(nil, forService: service)
            }
        }
    }
}
This method illustrates why the delegate pattern is important. If we hadn't set the view controller as the delegate of the CBPeripheral, then this method wouldn't get called – and we wouldn't be able to inspect the discovered Services.
But we did set it, and now we can see which Services are provided and use the ones from which we would like to get information, and peripheral(_:, didDiscoverServices:) is where we check to see if any of the UUIDs of the Services returned match the ones for temperature and humidity (1). If it matches either of those UUIDs, then we call discoverCharacteristics(_:, forService:) for that Service (2).
Discovering Characteristics
As we mentioned in the introductory post, Services have Characteristics. The Characteristics hold the data we want, but they can also control the device as well if they're used in the way Texas Instruments implemented them with the SensorTag.
Interestingly, there is a method for reading a value of a Characteristic:
sensorTag.readValueForCharacteristic(characteristic)
But we’re not going to use that.
Instead, we’re going to use something a little more interesting: Notifications. We'll use notifications because we want to get data from a value that changes periodically: the temperature and the humidity.
Therefore, when we call discoverCharacteristics for a Service, the peripheral responds by calling the peripheral(_:, didDiscoverCharacteristicsForService:, error:) delegate method.
Here’s where things begin to get a little complicated, but we’ll walk through it down below.
func peripheral(peripheral: CBPeripheral, didDiscoverCharacteristicsForService service: CBService, error: NSError?) {
    if error != nil {
        print("ERROR DISCOVERING CHARACTERISTICS: \(error?.localizedDescription)")
        return
    }

        if let characteristics = service.characteristics {
            // 1
            var enableValue:UInt8 = 1
            let enableBytes = NSData(bytes: &enableValue, length: sizeof(UInt8))

            // 2
            for characteristic in characteristics {
                // Temperature Data Characteristic
                if characteristic.UUID == CBUUID(string: Device.TemperatureDataUUID) {
                    // 3a
                    // Enable the IR Temperature Sensor notifications
                    temperatureCharacteristic = characteristic
                    sensorTag?.setNotifyValue(true, forCharacteristic: characteristic)
                }

                // Temperature Configuration Characteristic
                if characteristic.UUID == CBUUID(string: Device.TemperatureConfig) {
                    // Enable IR Temperature Sensor
                    sensorTag?.writeValue(enableBytes, forCharacteristic: characteristic, type: .WithResponse)
                }

                if characteristic.UUID == CBUUID(string: Device.HumidityDataUUID) {
                    // 3b
                    // Enable Humidity Sensor notifications
                    humidityCharacteristic = characteristic
                    sensorTag?.setNotifyValue(true, forCharacteristic: characteristic)
                }

                if characteristic.UUID == CBUUID(string: Device.HumidityConfig) {
                    // Enable Humidity Temperature Sensor
                    sensorTag?.writeValue(enableBytes, forCharacteristic: characteristic, type: .WithResponse)
                }
            }
        }
}
First we create an NSData object that holds one byte of information with the value of 1, which will enable the sensor we wish to turn on. (1)
Then (2) we loop through all the Characteristics returned, and for both the temperature and humidity data Characteristics, we turn on notifications (3a and 3b):
sensorTag?.setNotifyValue(true, forCharacteristic: characteristic)
Writing to a Characteristic
We’ve discussed that we can read from Characteristics, and that makes a whole lot of sense, especially in the context of receiving data from little wireless devices. But we can also write to them as well, and as was hinted at earlier, that's exactly how we turn on sensors in the SensorTag.
To write to a Characteristic, we take the bytes that we defined in step 1 above, and we call the writeValue(_:, forCharacteristic:, type:) method of the CBPeripheral object, which then bundles up and sends the data to the device. It’s very convenient and relatively easy to use, once you get past the creating-the-bytes-to-send step.
Here’s what it looks like in isolation, away from all the other code:
sensorTag?.writeValue(enableBytes, forCharacteristic: characteristic, type: .WithResponse)
Per the documentation, the CBCharacteristicWriteType.WithResponse type parameter (as opposed to CBCharacteristicWriteType.WithoutResponse) indicates that the ‘Characteristic value is to be written, with a response from the peripheral to indicate whether the write was successful, and if the write is unsuccessful, the peripheral responds with an error detailing the cause of the failure.’ We actually don’t catch the response in this demo but there appear to be other advantages to using this type of writing, which can be found in the discussion in Apple’s documentation for the CBCharacteristicWriteType constants.
In this case, we’re following the guidelines in TI’s documentation, which states:
“The sensors are enabled by writing 0x01 to the corresponding Configuration and then disabled by writing 0x00”
This is an engineer-speak way of saying that we will send a value of one to the Configuration Characteristic, which will turn on the sensor. So that’s what we’re doing when we write the enableBytes value to those Characteristics.
Send one: sensor enabled.
Send zero: sensor disabled.
As you can see from the larger code snippet above, we do this for both the temperature and the humidity sensor’s Configuration Characteristics.
It’s Alive!
Once we enable the sensors and have signed up for notifications, we’ll start receiving the data in the peripheral(_:, didUpdateValueForCharacteristic:, error:) delegate method, which happens to be same method that also gets called when you call the CBPeripheral’s readValueForCharacteristic method as well.
It’s important to recognize from that statement that we don’t get the value back immediately when reading a value of a Characteristic, as one might expect. Rather, the CBPeripheral object lets us know when it has read the value successfully in its own time.
This makes sense, because the call to read the value is not retrieving a value out of memory on your device as a normal read of a variable or property within our app would. It has to make a relatively high-latency wireless round trip to the device to retrieve the value, and it wouldn’t make sense to block the code in progress while waiting for the value to come back, because it may not return with the value until “a long time from now” from the perspective of the app.
Therefore the key to success with BLE is to “think asynchronous” and understand that everything happens non-linearly by means of the delegation pattern.
In the context of our demo project, because we have set up the delegation relationship with the CBPeripheral object, we begin to receive notifications through the peripheral(_:, didUpdateValueForCharacteristic:, error:) delegate method for both of the Characteristics to which we have subscribed.
func peripheral(peripheral: CBPeripheral, didUpdateValueForCharacteristic characteristic: CBCharacteristic, error: NSError?) {
    if error != nil {
        print("ERROR ON UPDATING VALUE FOR CHARACTERISTIC: \(characteristic) - \(error?.localizedDescription)")
        return
    }

    // 1
    // Extract the data from the Characteristic's value property
    // and display the value based on the Characteristic type
    if let dataBytes = characteristic.value {
        if characteristic.UUID == CBUUID(string: Device.TemperatureDataUUID) {
            // 2
            displayTemperature(dataBytes)
        } else if characteristic.UUID == CBUUID(string: Device.HumidityDataUUID) {
            // 2
            displayHumidity(dataBytes)
        }
    }
}
This is pretty straightforward. We (1) grab the data bytes as an NSData object from the Characteristic’s value that was returned. Then, we send that data on to the respective methods that will display the temperature or humidity.
First, we create a constant (I'm containing it in a struct called Device, but you may create it where you see fit) that indicates that we want to access the ambient temperature part of the Characteristic data:
struct Device {
    // ...
    static let SensorDataIndexTempAmbient = 1
    // ...
}
The next steps are where it gets a little complex again, but first take a look at the code below, and then we’ll just walk through it afterward.
func displayTemperature(data:NSData) {
    // We'll get four bytes of data back, so we divide the byte count by two
    // because we're creating an array that holds two 16-bit (two-byte) values
    let dataLength = data.length / sizeof(UInt16)

    // 1
    // create an array to contain the 16-bit values
    var dataArray = [UInt16](count:dataLength, repeatedValue: 0)

    // 2
    // extract the data from the dataBytes object
    data.getBytes(&dataArray, length: dataLength * sizeof(Int16))

    // 3
    // get the value of the of the ambient temperature element
    let rawAmbientTemp:UInt16 = dataArray[Device.SensorDataIndexTempAmbient]

    // 4
    // convert the ambient temperature
    let ambientTempC = Double(rawAmbientTemp) / 128.0
    let ambientTempF = convertCelciusToFahrenheit(ambientTempC)

    // 5
    // Use the Ambient Temperature reading for our label
    let temp = Int(ambientTempF)
    lastTemperature = temp

    // If the application is active and in the foreground, update the UI
    if UIApplication.sharedApplication().applicationState == .Active {
        updateTemperatureDisplay()
    }
}
The basic strategy is that we create an array of 16-bit values (UInt16 values in Swift) to hold the data we receive from the device (1). The CBPeripheral gives us an NSData object, which we extract into the array (2). We grab the element out of that array that represents the ambient temperature in its raw form (3), and then convert it into celsius and fahrenheit values (4), which we can use to populate the label, depending on which unit you prefer to use. I won’t explain the code that populates the label (5), because you should already know how to do that.
Additionally, retrieving the humidity value is almost identical to reading the temperature, so I'll leave that analysis to you as an exercise, the only difference is that the relative humidity calculation (calculateRelativeHumidity) uses a formula that was lifted almost verbatim from the TI User Guide’s section on the Humidity Sensor, and only altered a tiny bit so that it would compile correctly in Swift.
Putting It All Together
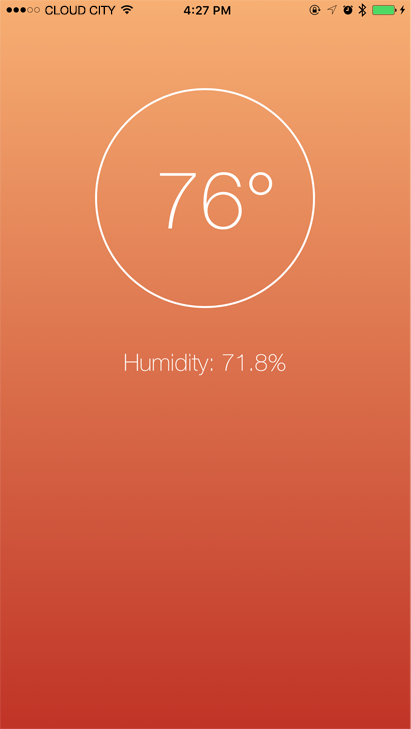
Once all of those pieces are in place, when you run the project, the app should just find the SensorTag, connect, and start reading the values. You can see them change in real-time as you move the device around.
Here’s what my finished product looks like, and you can dress up yours however you like!
Disconnection
As a side note, the app disconnects when the app is terminated. If you background the app for a little while, you can still revive it and see the values change. However, if you want to force a disconnection, stop the app in Xcode if you launched it from Xcode, or, if you are running it on device as a standalone app not launched by Xcode, tap your home button twice and swipe up on your app’s display to terminate the app. You'll see the SensorTag’s green LED blink to let you know that it’s disconnected.
And, yes, you can also disconnect from a peripheral explicitly in code, too.
Conclusion and Next Steps
I certainly hope that this has given you a concrete in-depth look at how to interact with a real Bluetooth LE (or “Bluetooth Smart”) hardware device. The feeling of interacting with an external device – one that on the surface might appear like a black box (or in this case, a little red silicone box) – is a unique experience and it will probably leave you wanting to experiment more.
As you start to play with the SensorTag more, you may discover other creative uses for it. You may also come across other BLE devices with which you would like to interface with using the techniques outlined above, so feel free to experiment!
In the next part of our series we will go a little further and talk about how to reconnect to a device, and discuss some other issues that may come up in your Bluetooth LE development. We may even come up with a fun new demo project!